Author Archives: markn

About markn

Mark is the owner and founder of Timesheets MTS Software, an mISV that develops and markets employee timesheet and time clock software. He's also a mechanical engineer, father of four, and a lifelong lover of gadgets.

    Find more about me on:
  • googleplus
  • linkedin

Brew Day 10 – Hard Apple Cider Version 2

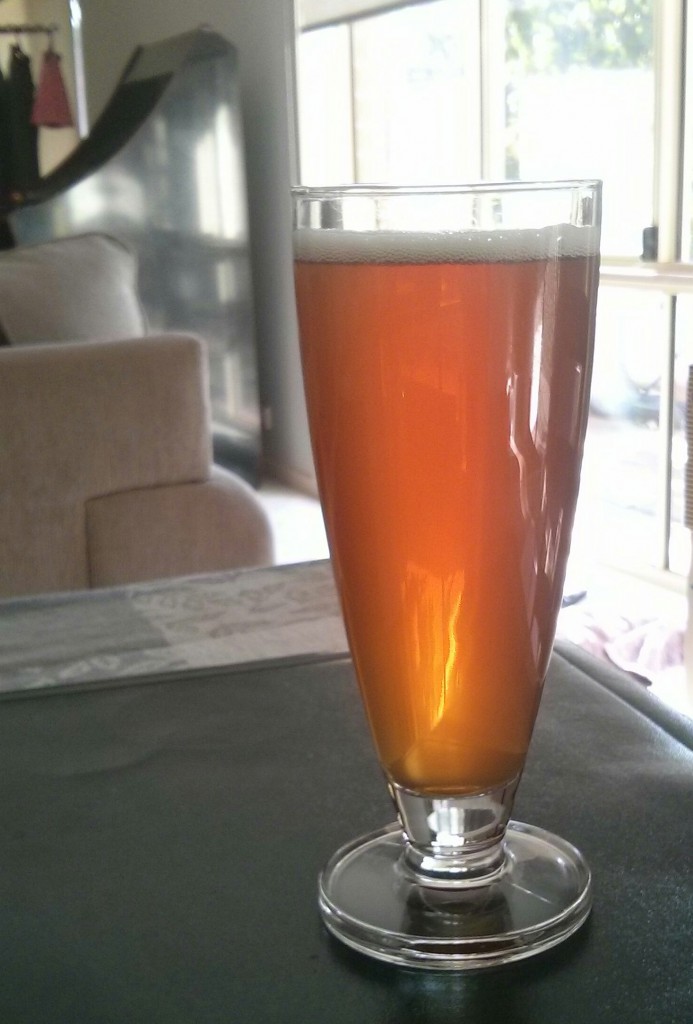
My test batch of hard apple cider is pretty good. Especially on a hot day with some ice cubes and back sweetened with a bit of apple juice. I was keen to get some more on the go for summer so I whipped up a quick batch (largely unplanned) to get into bottles.

Recipe
14.4L of store bought clear apple juice
Juice from two lemons
Two cups of water
2 bags of English black tea
Handful of raisins
SAFALE-US05 yeast in 500mL LDME starter

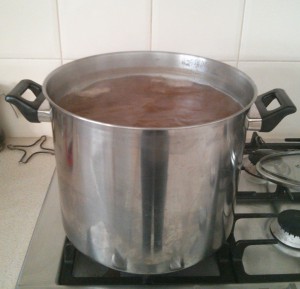
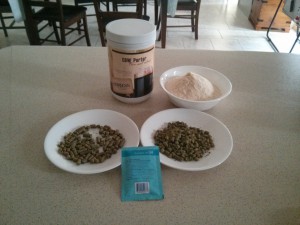
I hydrated the raisins in a cup of hot water. The raisins were designed to act as nutrients for the yeast. In a saucepan I put the juice of two lemons and another cup of water before bringing it to a boil for a few minutes. Once off the heat I added the two tea bags and allowed them to steep for 10 minutes. Once done I added the raisins and water and allowed it all to cool to room temperature. I had some harvested SAFALE US05 in the fridge so I got that excited with 100 grams of LDME dissolved in 500mL of boiled water. The bottled juice was poured into my sterilized fermentation vessel, then the cooled juice/water/raisins were added and I aerated it with a large spoon. Dumped in the 500mL yeast starter, screwed on the vessel lid and put an airlock in place. The whole lot was put into my temperature controlled fridge at 18.5C. I’ll leave it there for two weeks before taking a gravity reading. OG was 1.050.

Once fermentation is done I’ll be racking the cider off into the original six plastic bottles the juice came in for secondary fermentation. Some will have fruit (apples and pears) added so I can compare the outcomes.

Update 17 October 2015

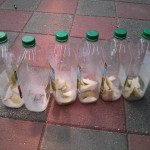
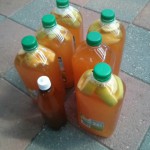
Planning to put some fruit in the cider I cut up about a kilo of pears and apples today and starsanned them to remove any bacteria from the skin. I racked off the fermentation vessel into the original 6 2.2L bottles (plus one extra 750mL bottle). I packed two bottles with apple and pear, one with just pear, one with just apple and left one bottle without any fruit. All the bottles went back into the fermentation chamber set for 19C. I’ll leave them there for two weeks before putting the lot into bottles and bulk primed for secondary fermentation.

Sterilised bottles with fruit

Sterilised bottles with fruit

Filled bottles

Filled bottles

Brew Dog

Brew Dog

Update 31 October 2015

While I was brewing some beer I sterilised 16 750 PET bottles. I primed each with 6g of white sugar (what a pain in the ass that was) before carefully draining the cider from their larger bottles into the smaller bottles. I did this with a sterilised funnel. After capping the bottles and carefully noting their contents on the lids I gave each a good shake to dissolve the sugar. The bottles were then moved to my largering cellar (garage) where, I hope in two weeks they’ll be carbonated and ready to drink!

Brew Day 9 – BIAB APA Version 2

The all grain BIAB American Pale Ale I made on my last brew day is delicious. Simply wonderful. Even not fully carbonated it’s awesome with a great malt character, much more so than any beer I’ve made to date. So of course I’m making another batch with a few variations. This time I want to shoot for something a bit drier, more malt character, an less bitterness. I suspect the hop-stand of Cascade at the end of the boil is adding more bitterness that I’d like. Basically I’m looking for a recipe that is more drinkable in the up-coming summer months. To achieve these aims I’m going to mash at a bit lower temperature (to extract more fermentable sugars from the malted grain), replace the crystal/LDME with Munich I malt, and decrease the initial Magnum hop addition by two grams.

Bairds Golden Promise 2.5kg
Munich Malt I 0.35kg
10g Magnum @ 60 minutes (12.7%AA)
18g Cascade @ 10 minutes (5.6%AA)
12g Cascade @ Flameout for 10 minutes (5.6%AA)
SAFALE US-05 harvested from last brew

Brew Type : 12.5L All Grain (BIAB)

OG: 1.050
FG: 1.013
ABV: 5.1%
IBU: 30.7
EBC: 10.1

Method:
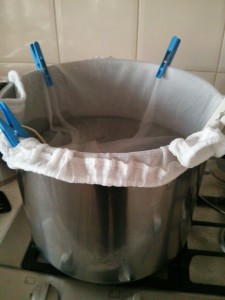
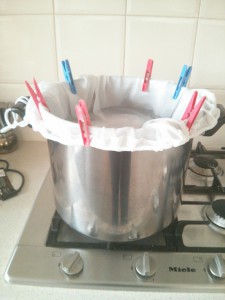
Heating the Strike Water

Heating the Strike Water

1. Bring 8L of water to strike temperature of 72C with grain bag lining pot. Extra reading I’ve done since my last brew suggested my mash was too thin so I’ve dropped the strike water by 2L.
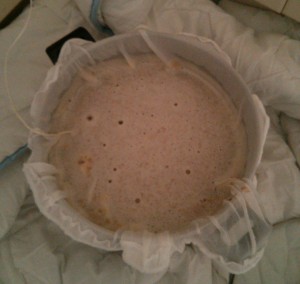
Mashing In!

Mashing In!

2. Add grain bill, stir to ensure no dough balls.
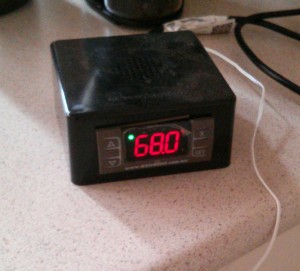
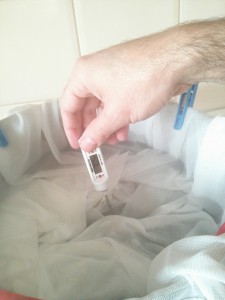
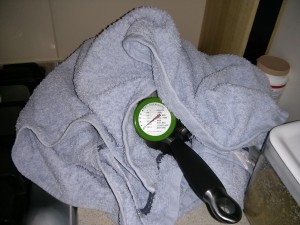
Using my Keg King Controller to Take the Mash Temperature

Using my Keg King Controller to Take the Mash Temperature

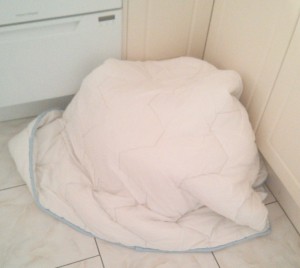
3. Took temperature of mash (66.5C) replaced lid on pot, and wrapped pot in doona for 60 minutes to mash.

4. Bring 8L of water to 75C in another pot.

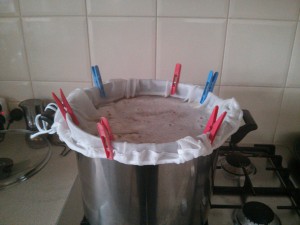
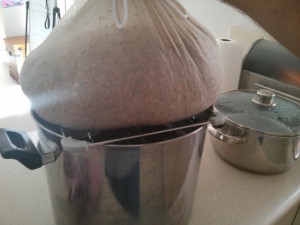
5. At the end of 60 minutes unwrap pot, take temperature again (62.3C). Remove grain bag from pot and suspend over pot on wire tray and allow to drain out. At this point there was 6L of wort in the pot.

6. Batch sparge with the half wort and half the 75C water and allow to drain. Sit bag in remainder of 75C water, drain, empty wort empty into pot, squeeze out bag again.
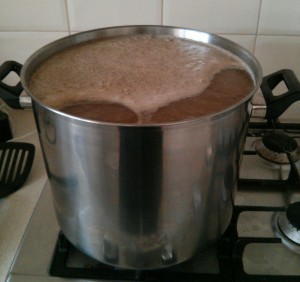
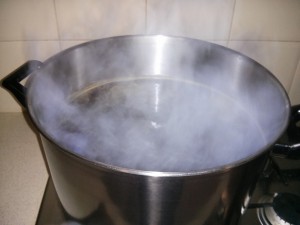
Bringing Wort to the Boil

Bringing Wort to the Boil

8. At this point I had 13.5L of wort and drew a small sample for take a gravity reading (1.035 at 51.7C). I’ve bought some FERMCAPs which is supposed to stop boilovers so I can get more wort in my 15L pot. I added 6 drops of the FERMCAPs to pot and now I could bring the pot to the boil and make the first hop addition. This brew I decided to make little muslin bags to put my hops in so I didn’t need to strain out the debris when putting the wort into my fermentation vessel.
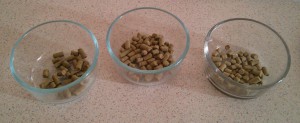
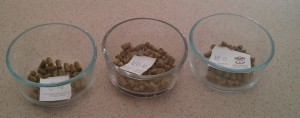
Hop Additions (10g Magnum, 12g Cascade, 18g Cascade)
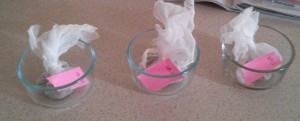
Hop Additions (10g Magnum, 12g Cascade, 18g Cascade)

Hop Additions in Baggies!

Hop Additions in Baggies!

9. At 50 minutes make second hop addition.

10. At flameout add third hop addition and whirlpool and leave for 10 minutes. There was a 2.5L loss during the boil.

11. Chill wort in ice bath to 25C.
S05 Yeast Starter

S05 Yeast Starter

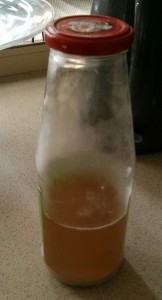
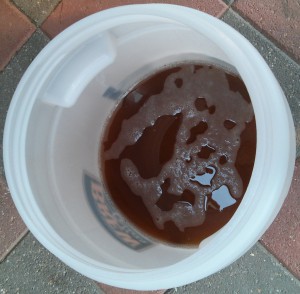
12. Top up to 12.5L with cool boiled water, take starting gravity reading and aerate wort with spoon. I harvested some S05 yeast from my last brew and got things moving along with a 500mL starter. I drained off the expended wort from the top of the starter, replaced it with a bit of my new wort, shook it vigorously and then pitched into my vessel. I put the lid on the fermenter, filled the airlock with sanitizer and put it all in my temp controlled fridge with a set temperature of 18.5C.
Let's Ferment!

Let’s Ferment!

My measured OG was 1.046 @ 24.2C which corrects to 1.047. Not too far of my target of 1.050, the difference is explainable as my BIAB efficiency is not as high as the calculator I am using to develop my recipes.

Mash Efficiency

2.5KG of Golden Promise Malt has a potential of 1.038 points per gallon. I’ve got 5.5lb of grain in 3.56 gallons of water so the potential for the GP is 58.71 points.
0.35KG of Munich I malt has a potential of 1.037 points per gallon. 0.35*2.2*37/3.56 leads to a potential for the Munich Malt of 8.21 points.

So, there’s potential of 66.92 points (58.71+8.21) and the measured pre-boil gravity of 1.045 (45 points) gives 67.25% (45/66.92) efficiency.

Other Notes

I used the Brewers Friend Mash Temp Calculator to arrive at my strike temperature of 72C. Assumption was made that there’d be 1L of water absorption per kilo of grain. The targeted pre-boil volume was 13L so this is how I arrived at the 8L of sparge water (13L boil – 8L strike + 2.85L absorption, about 8L). Note to self, must weigh down hop bags with marbles or they float at the top of the boil. Other note to self, the 4C drop during the mash was probably due to the doona being cold. Either think about building a simple mash tun from an esky or pre-heat dooa with a pot full of hot water. I can use the hot water to sparge anyway so there’s no waste.

Fermentation Notes

Fermentation commenced within 12 hours of pitching and I really only saw activity in the airlock for a day.

20/9/15 – Drew a sample and took the gravity, 1.009.

Drinking Notes

I’ve been holding off on commenting on this beer for a while hoping it would improve (or I’d learn to like it).  On the eye it’s a nice looking beer, a pale gold and just a little cloudy, not as cloudy as, say, a Coopers Pale Ale, but more cloudy than a lager.  On the nose it’s decent too, with hints a bread and just a bit of lemon or citrus from the Cascade hops.

The first mouth full is good too, with a massive up front malt hit.  However from that point forward it’s all down hill.  The initial malt hit lessens in intensity and there’s just not enough bitterness.  Couple that with, what I can only call wateriness and an unpleasant taste in the mouth after half a pint and it doesn’t make for a particularly enjoyable beer.  I’m not sure what the issue is but I’m thinking there’s three main factors:

  1. The grain was of questionable quality.  First time I’ve bought grain from that particular LHBS and there’s no telling how hold it was.  I’ve bought hops from them once before and it was not great either.
  2. My mash temperature control was awful, I dropped way too much temperature.
  3. Not enough Magnum meant not enough bitterness.

I’ll drink what’s left but I’m keen to move forward with another brew and sort out these issues.

What Next

I’d like to try the same beer with grain from the other LHBS (which is usually pretty good), a few grams more hops at 60 minutes, and with better temperature control on the mash.

Brew Day 8 – BIAB American Pale Ale

I’ve decided that with half a dozen extract brews under my belt it’s time to take the step to all grain. I like my smaller batch size of 12L or so and I don’t want to spend too much more on brewing equipment so Brew In a Bag (BIAB) seemed like the best way to get started. The only additional investment required was a drawstring mesh bag from my LHBS which set me back $10.

Basically the process is to heat the strike water to the mash temperature plus an allowance for the cold grains. Put the mesh bag in the kettle and line the kettle and then add the grains and stir to ensure no dough balls. Put the lid back on the pot and insulate the pot with a blanket or similar to hold the temperature steady for 60 minutes. Once that’s done remove the bag of grain from the pot and rest it on a wire tray on top of the pot and allow the wort to drain out. The final step is to sparge the bag with 75C water to remove the last of the sugars and get the required initial boil volume. From that point the process is the same as extract brewing.

As this was my first try at this process I designed a recipe with a simple grain bill and hop schedule. I settled on an American Pale Ale with Golden Promise malt forming most of the grist, bittering hops (Magnum) and an American style (Cascade) hop for flavour and aroma. This is the first time I’ve used a hop variety specifically for bittering and I’m hoping it’ll reduce the costs of brewing a few dollars each batch. I’m also trying a flameout addition of Cascade in this brew.

Bairds Golden Promise 2.5kg
Bairds Pale Crystal 0.2kg
0.2KG LDME
12g Magnum @ 60 minutes (12.7%AA)
18g Cascade @ 10 minutes (5.6%AA)
12g Cascade @ Flameout for 10 minutes (5.6%AA)
SAFALE US-05

Brew Type : 12.5L All Grain (BIAB)

OG: 1.052
FG: 1.014
ABV: 5.4%
IBU: 36.3
EBC: 15.8

Method:

Bag lining pot

Bag lining pot

1. Bring 10L of water to strike temperature of 70C with grain bag lining pot.

Measuring the strike temperature.

Measuring the strike temperature.

2. Add grain bill, stir to ensure no dough balls.

We have Mash!

We have Mash!

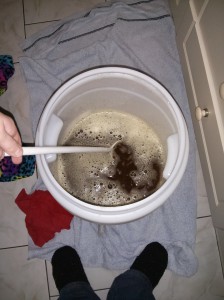
3. Took temperature of mash (68.3C) replaced lid on pot, and wrapped pot in doona for 60 minutes to mash.

Brew pot all cozy for 60 minute mash.
Brew pot all cozy for 60 minute mash.
4. Bring 4L of water to 75C in another pot.
5. At the end of 60 minutes unwrap pot, take temperature again (66.8C). Remove grain bag from pot and suspend over pot on wire tray and allow to drain out. At this point there was 8L of wort in the pot.

Draining grain bag, heated sparge water to the right.

Draining grain bag, heated sparge water to the right.

6. Batch sparge with the 75C water and allow to drain.
7. Put grain bag in large container and squeeze (and I mean SQUEEZE) to remove the last of the wort.
8. At this point I had 12L of wort and drew a small sample for take a gravity reading (1.036 at 60C). Now I could bring the pot to the boil and make the first hop addition.

Hop Additions!

Hop Additions!

9. At 50 minutes make second hop addition and stir in LDME.

Boiling Wort

Boiling Wort

10. At flameout add third hop addition and whirlpool and leave for 10 minutes. There was a 1.5L loss during the boil.
11. Chill wort in ice bath to 25C.
12. Tip wort into FV through strainer to remove most of the hops. Top up to 12.5L with cool boiled water, take starting gravity reading, aerate worth with spoon, pitch packet of yeast put airlock in place and commence fermenting.

The wort was measured at 26C before pitching and had a gravity of 1.057 (target 1.052). The FV was put into the fermentation fridge with a set temperature of 18.5C.

How I Calculated the Strike Temperature

I wanted to mash at 68C (154F) which is at the upper end of the ideal range but I wasn’t sure what heat loss I’d get out of the mash with the Heath Robinson insulation I had at hand. In the end I played around with this Brew in a Bag Calculator for a while and it looked like I’d see a drop of 1.5C to 2C when the grain was added to the strike water. Hence, I settled on 70C for the strike water temperature. As it turned out there was a 1.7C temperature drop when the grains were stirred in so the calculator was right on the money.

Mash Efficiency

One of the key advantages of BIAB over normal grain brewing is that the grain can be milled very fine without the risk of a stuck sparge. This leads to a decent improvement in mash efficiency. Mash efficiency is the actual extraction of sugars from the grain bill during the mashing process against the total potential sugars from the grain bill. From what I’d read 80% efficiencies from the BIAB are not unusual but unfortunately my LHBS couldn’t adjust the coarseness of the grain crush. I was expecting less than 80% because of the crush issue and also my inexperience with the process. I used this calculator to work out mash efficiency based on the 12L of pre-boil wort that had a gravity of 1.036 at 60C. Correct that for temperature and you have a gravity of 1.049. The calculator reported an efficiency of 71%. The calculation runs something like this (I think)

2.5KG of Golden Promise Malt has a potential of 1.038 points per gallon. I’ve got 5.5lb of grain in 3.17 gallons of water so the potential for the GP is 65.9 points.
0.2KG of Bairds Pale Crystal has a potential of 1.035 points per gallon. 0.2*2.2*35/3.17 leads to a potential for the Pale Crystal of 4.89 points.

So, there’s potential of 70.75 points (65.9+4.89) and the measured pre-boil gravity of 1.049 (49 points) gives 69.25% (49/70.75) efficiency which is close to the calculator’s result.

29 August 2015 – Took a sample to test the gravity. 1.015 so I’m calling that done. The sample has a nice floral aroma, even my partner who doesn’t like beer said it smells like flowers. I am going to fine with gelatin, cold crash and bottle in 48 hours.

31 August 2015 – Racked off fermenter into my bottling drum and bulk primed with 96 grams of brown sugar dissolved in 200mL of hot water. Bottled into my usual 750mL PET bottles. Yield was 15 full bottles (11.25L) with 200mL leftover for me to drink. Which I did and it was delicious. It was amazing how much clearer the beer was after just 48 hours of cold crashing and fining with gelatin. No doubt it will clarify further in the next 2-3 weeks as it carbonates in the bottles.

Tasting Notes

The beer is good, it’s nice and bitter with a strong up front malt character. The hops doesn’t come through much with just a hint of grapefruit perceptible. My partner says it smells a bit like soy sauce which made me thing it had either oxidized or been on the yeast cake too long, neither of which is really possible. Regardless I’ve drunk half the batch in two weeks so I like it 🙂 There’s some chill haze but I’m putting that down to the poor effort I made cooling the wort due to poor planning on my behalf.

apa

%ProgramData% and Roaming Profiles

All of my desktop products use the Windows %ProgramData% folder to store files such as configuration files, log files, database files and so on. Basically any file that needs to be written to is stored there. It’s simply not good practice to store files that need to be written to in the %ProgramFiles% folder because there’s no guarantee the Windows user will have write permissions on files stored there. Now, usually the %ProgramData% folder can be found here:

c:\Program Data\

I store the data for each program in a folder something like:

c:\Program Data\Program Name\

That’s all dandy but when an application is 32bit Windows can be configured (via the UAC) to use a “VirtualStore” for any files that are modified and Windows considers that those files should be protected. I am not entirely sure why, but the ProgramData folder can be thrown in this boat and it ends up getting virtualized. The upshot of this is that when I go and take a look at a config file for one of my programs (in the C:\ProgramData\Program Name\ folder) the file is either empty or contains only the initial set of data. Yet, the program still runs perfectly and is saving config options without issue. So where is Windows actually storing the files that the software is changing? It’s here:

C:\Users\UserName\AppData\Local\VirtualStore\ProgramData\Program Name\

Hopefully this blog entry stops me from tearing my hair out in the future when I am looking for this location again!

Putting the Search Box into the Primary Menu in the Virtue Theme

I used the free Virtue theme in a recent contract and wanted to put the WordPress search box into the primary navigation menu. That was done easily enough by putting this into the child theme functions.php file:

function add_search_form_to_menu($items, $args)
{

    if( $args->theme_location != "primary_navigation" )
        return $items;

    return $items . '<li class="my-nav-menu-search">' . get_search_form(false) . '</li>';
}

However, the site I was building needed a private area for members and I’d been tinkering with the WordPress Access Control Plugin (WPAC) to accomplish that. The plugin allows you to display different menus to users who are logged in and those who are not. One menu (called Top Menu) was setup by WPAC to display as the Primary Navigation for users who were not logged into WordPress. While another (I called Top Menu – Private) was setup to display to members only. Obviously I wanted the WordPress search box to display on that menu too so I had to modify the above PHP slightly to allow for the private menu. Here’s how that worked:

function add_search_form_to_menu($items, $args)
{
    if( ($args->theme_location != "primary_navigation") && ($args->theme_location != "primary_navigation_wpac") )
        return $items;

    return $items . '<li class="my-nav-menu-search">' . get_search_form(false) . '</li>';
}

So there you have it. How to get the WP search box to display in the primary navigation menu when using the Virtue theme, and when using the Virtue Theme with the WordPress Access Control Plugin.

Brew Day 7 13 July 2015 – American IPA V2

I’ve been extremely happy with my first attempt at a home brewed IPA and because I’d nearly run out (it’s delicious) the time had come to brew a new batch. I decided to increase the DME a little and drop the brown sugar for better mouth feel and lower ABV. Additionally I was going to use a yeast starter harvested from a batch of American brown ale, which in turn used yeast that was harvested from the very same initial batch of IPA. The original strain was SAFALE-US05. Unfortunately my initial recipe was thrown into disarray because my LHBS of choice is shut on Mondays (damn them) and I had to go to my backup where I purchased alternate ingredients. I’ve replaced the Briess Light LME with Coopers Light LME and used Simcoe hops different alpha which I suspect are not particularly fresh. The hopping schedule has changed somewhat too, with more put into the late boil to give more flavour/aroma while still providing the required bittering.

1.5KG Coopers Light LME
0.6KG Light DME
0.2KG Brown Sugar
Briess Light Crystal Malt 0.25KG
17g Simcoe @ 60 mins 12.7%AA
35g Simcoe @ 5 mins 12.7%AA
3rd Generation SAFALE US-05 in 500mL starter (50g DME, 500mL cool boiled water).

Brew Type : 12.5L Extract

OG: 1.065
FG: 1.015
ABV: 6.9%
IBU: 49.0
EBC: 20.7

Method:

1. Bring 8L of water to boil. The water had sat in the boil pot for 24 hours to allow any chlorine or other volatiles to evaporate.
2. Steep the crystal malt in 1L of 65-70C water for 30 minutes.
3. Strain the crystal malt through a muslin lined strainer into into boil pot and sparge with 1L of 65-70C water.
4. Add 1KG of the Coopers LME to bring up gravity of wort for better hop utilisation.
5. Put heat back on and bring to rolling boil. When boiling make first hop addition. Boil for 55 minutes and make second addition. Boil for a further 5 minutes, turn off heat and stir in the remaining LME, DME, and brown sugar and mix well to ensure it is all dissolved. Add cold water to bring volume to 12L and plunge pot into ice bath to bring wort to 25C.
6. Tip wort into FV through strainer to remove most of the hops. Take starting gravity reading, aerate worth with spoon, pitch yeast starter put airlock in place and commence fermenting.

The wort was measured at 24C before pitching and had a gravity of 1.068 (target 1.065). The FV was put into the fermentation fridge with a set temperature of 18.5C.

Fermentation Notes

14 July 2015 – Fermentation appears to have started after about 18 hours.
18 July 2015 – Turned set temperature up to 20.5C.
20 July 2015 – Took gravity reading, 1.018. This is still a little high, will take another reading in two days to check for any changes. If no change will dry hop then.
22 July 2015 – Dry hopped with 48g of Simcoe and turned fridge down to 18C.
25 July 2015 – Turned of temperature controller and turned on fridge, cold crashing for 2 days.
27 July 2015 – Bulk primed with 104g of white sugar in 200mL of boiled water. Still not happy with carbonation of previous batches so I’m trying 8g/L. I racked the FV off into another vessel as usual with the sugar solution and bottled using my bottling wand. Yield was 11.3L. However, as I usually do I drank the last dregs out of the bottling vessel and they were very sweet so clearly the sugar had not dispersed into the beer correctly when the beer was draining into it. So I don’t expect any sort of even carbonation. Dammit. Note to self, mix bulk primed beer to ensure proper sugar dispersal. Second note to self, you forgot to take a final gravity reading you idiot. I harvested yeast out of the fermentation vessel and washed it once and it’s now sitting in the fridge ready for the next brew day.

Tasting

8 August 2015 – I cracked a bottle today and poured it into my glass of choice. Head was decent and creamy. There was a little bit of passionfruit on the nose, but given that I suspected the Simcoe hops I used were old this isn’t surprising. The beer seemed a little more bitter than the first IPA I made and a bit dryer in the mouth. Still, it’s very tasty and was an enjoyable quaff. Should improve in a week or two with more carbonation.

American IPA Version 2

American IPA Version 2

Brew Day 6 3 July 2015 – Brown Porter

It’s cold here now (well as cold as it gets) and I wanted to brew something that I could age in the garage for a month or two without ill-effects while it was cool. Enter an English brown porter. I’ve used my trusty kit & extract beer designer spreadsheet again and have come up with the following recipe:

1.5KG Briess CBW Porter LME
0.15KG Light DME
0.1KG Bairds Pale Crystal Malt 30EBC
0.25KG Bairds Chocolate Malt 1230EBC
20g Fuggles @ 60 mins 4.6%AA
25g East Kent Goldings @ 5 mins 5.7%AA
12g Fuggles @ 5 mins 4.6%AA
SAFALE S04 English Ale Yeast.

Brew Type: 12L Extract

OG: 1.048
FG: 1.012
ABV: 5.1%

Brown Porter Ingredients (Chocolate Malt/Pale Crystal not shown)

Brown Porter Ingredients (Chocolate Malt/Pale Crystal not shown)

I’ve stuck with a lower ABV brew again as it’s easier to drink (my double can stout is still knocking me from pillar to post). I’ve gone a bit overboard with the specialty grains but what the heck. No sugar this time, just LME for better mouth feel and higher final gravity. And why the 12g of Fuggles @ 5 minutes? That’s all I had left so I thought I should just put it in there.

Method:

1. Steep the light crystal and chocolate malt in cold water in the fridge overnight.
2. I’d put 8L of tap water in my brew kettle overnight to allow the volatiles to evaporate and this was now brought to the boil and the heat turned off.

Straining the Specialty Grains

Straining the Specialty Grains

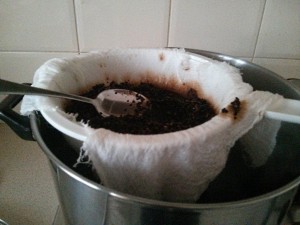
3. Strained the grains through a colander lined with muslin into the brew pot. Sparged with 1L of 70C water.
4. Added 1KG of the Porter LME to bring the wort gravity up for better hops utilisation.
5. Put heat back on, bring wort to the boil and make first hop addition.
6. Second hop addition made at 55 minutes.
7. At the end of the hour take the kettle off the boil and add the balance of the LME and DME and stir to ensure it is dissolved.
8. Cool wort (there was about 7L left) in ice bath and bring temperature as quickly as possible down to 27C. This took 35 minutes. I sped up the process this time by freezing 2L of boiled water and putting this into the hot wort.
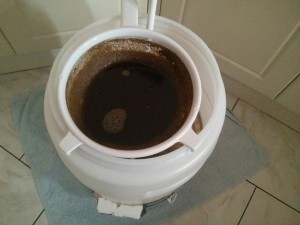
9. Once down to temperature I tipped the wort into the FV passing it through a mesh strainer to pick up most of the hops. I topped off the FV with a couple of liters of cool water, took a temperature (25.2C) and a gravity reading (1.048).

Straining the Wort

Straining the Wort

10. I aerated the wort as much as possible with a large spoon, pitched the whole packet of S04 yeast, screwed the lid onto the vessel, topped off the airlock with StarSan solution and put the whole lot in my temperature controlled fridge. I set the temperature to 18.5C.

The plan is to allow the beer to ferment for a full two weeks and then rack it off into a secondary for aging (for 2-4 weeks) before bulk priming and bottling. I haven’t decided if I’ll dry hop yet, but given that it’s an English style brown porter it shouldn’t really have a strong hop characteristic. I’ll do some research in the next week or two and decide later.

12/7/2015 – Moved the fermentation vessel into my garage. It’s pretty cool here now (15C or less most days). I’ll leave it there for a few weeks to age.
8/8/2015 – Racked off fermentation vessel into my bottling vessel and bulk primed with 104g of white sugar dissolved in 200mL of boiling water. Made sure to mix beer before bottling. Yield was 16 750mL bottles (12 litres) so the priming was 8g/L. Hopefully there’s a decent head on this brew.

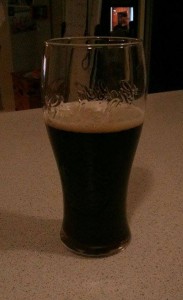
29/8/2015 – Opened the first bottle tonight. Nice bit of roastiness up front, not too much bitterness. Pleasant enough to drink but seemed a little watery. Will be interesting to sample again over the coming weeks. Good white head that lasted to the bottom of the glass with fine bubbles. Overall not too bad at all.

English Porter

First Glass of Brown Porter

Preloading Images with CSS

Here’s a helpful snippet that will preload images with CSS. Stops that annoying lag when using CSS to switch images and the image isn’t pre-loaded.

body:after {
	display: none;
	content: url("filename1.png") url("filename2.png");
}

Etching My Brew Pot

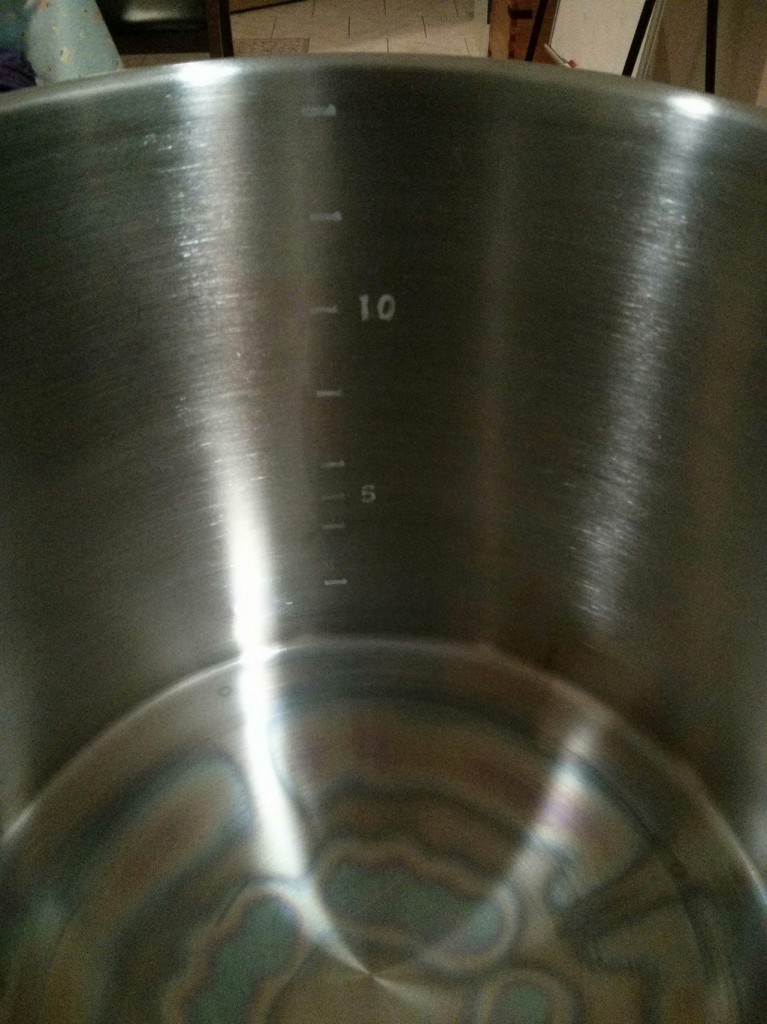
Despite being a non-drinker my lovely partner, Kathryn is enabling my new home brewing hobby with the quiet patience that only the most lucky of home brewer’s partners must show. She’s gone out of her way in the last couple of weeks to buy me a flash new 15 litre stainless steel brew pot and then some nice adhesive stencils so I could etch the inside of the pot with volume markings. This makes it far easier to fill the pot to a given volume of water without all that tedious mucking about with measuring jugs. Note that this method will only work on stainless steel and you should test it out on an unobtrusive part of the pot before you etch the inside. Any mistakes made in there will be looking back at you every time you brew so get it right. Here’s how I did it:

  1. Put a run of tape down the inside of the pot and then fill it with known volumes of water and mark the tape at each level. In my case I marked it at 2L, 4L, 5L, 6L, 8L, 10L, 12L, and 14L.
  2. Drain and thoroughly dry the pot.
  3. Stick stencils to the inside of the pot with tape so that they align with your markings on the tape. In my case I chose to have numerals next to the 10L and the 5L mark and just straight lines to mark off the other levels.
  4. Make a mixture of white vinegar and salt. I only made about 100mL and added a few grinds of salt from our salt grinder. I mixed it to dissolve the salt properly.
  5. Get two lengths of thin gauge electrical wire (about 50cm each) with the insulation stripped from the ends, a 9V rectangular battery (PP3 cell), and a number of cotton buds or cotton swaps or q-tips.
  6. Using electrical tape attach the end of one wire to the + (positive) terminal of the battery and tape the other end of the same wire to the side of the brew pot.
  7. Tape the end of the other wire to the – (negative) terminal of the battery and tape the other end of the wire to the end of the cotton bud so that the bare wire is pressed into the cotton bud near one end.
  8. Dip the end of the cotton bud with the wire on it into the vinegar and salt solution, gently wipe off the excess and then apply it to the stencils where you want to etch the pot gently working it slowly back and forth. There should be a gentle sizzling sound and perhaps some white vapour. That’s chlorine gas so make sure you do this in a well ventilated area.
  9. Re-dip the cotton bud as required and apply to the stencils until an even white etch is achieved on the stainless steel. I changed the cotton bud a few times because it got dirty and I didn’t like it. I suspect it doesn’t matter but I did it anyway.

The end result is pretty nice, perhaps a bit rough around the edges but not bad for a rank amateur like myself. See for yourself:

15L  Brewpot with etching

15L Brewpot with etching

Thanks to this article on Brew Your Own for the inspiration for this little project.

Brew Day 5 10 June 2015 – American Brown Ale

I’ve been more than delighted with my extract American IPA I wrote about here so I was keen to try out another extract brew. My LHBS had Coopers Amber Malt Extract on special so I picked up a can of that and spent a week designing a beer that would use it. I settled on a 13 litre batch of a single hop American Brown Ale. I wanted to try another American hop so settled on Cascade which can be used as a bittering and flavouring hop that adds citrus notes. The recipe is as follows:

1.5KG Coopers Amber Malt Extract
0.45KG Light DME
0.05KG Bairds Pale Crystal Malt
0.10KG Bairds Chocolate Malt 1230EBC
0.05KG Brown Sugar
20g Cascade @ 60 mins 7.6%AA
20g Cascade @ 5 mins 7.6%AA
50g Cascade dry hopped after 7 days for a week
SAFALE US-05 yeast harvested from previous brew.

Brew Type: 13L Extract

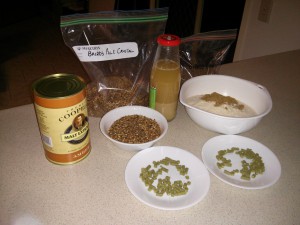
Brew Ingredients including Amber LME, light DME and sugar, 40g of Cascade hops, two types of crystal malt and harvested yeast

Brew Ingredients including Amber LME, light DME and sugar, 40g of Cascade hops, two types of crystal malt and harvested yeast

OG: 1.052
FG: 1.013
ABV: 5.4%

I went for an easier drinking beer this time as my last two brews have be delicious but after one 750mL long neck of either I am done for the night. I was hoping this beer would go down a bit easier. I also dialed back the amount of crystal and sugar to keep it under 10% of fermentables based on recommendations I’d read on various forums.

Method:

1. Steep the light and chocolate crystal in a muslin in 66-70C water for 30 minutes.

Light Crystal and Chocolate Malt Steeping Nicely

Light Crystal and Chocolate Malt Steeping Nicely

2. Bring 9L of water in brew pot to boil.
3. Sparge crystal with 1L of 70C water (I forgot to do this and just drained the muslin) and tip into brew pot.
4. Add 1.2KG of the Amber LME to the brew pot to bring the SG up to 1.040 to maximise hop utilisation. Bring pot to rolling boil and add 20g of Cascade.

Boiling wort in my new 15L brew pot (thanks Kath :))

Boiling wort in my new 15L brew pot (thanks Kath :))

5. At 55 minutes add the other 20g of Cascade.

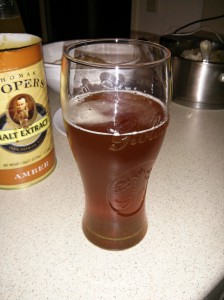
American IPA to pass the time

American IPA to pass the time

6. At the end of 60 minutes take pot off of boil and dissolve the remaining LME, DME, and brown sugar in brew pot mixing thoroughly to ensure it is dissolved.
7. Place pot in ice bath and bring temperature as quickly as possible down to 25C. This was accomplished in about 30 minutes.
8. At this point I took an SG reading (1.053) and tipped the contents of the brew pot into my fermentation vessel.

Stirring the Pot

Stirring the Pot

9. I mixed the FV trying to aerate the wort as much as possible before tipping in the contents of my harvested yeast starter. The starter was made 24 hours previously by dissolving 50 grams of DME into 500mL of cool boiled water and pitching my harvested yeast into it and allowing it to ferment.

My Daughter Pitching the Yeast!

My Daughter Pitching the Yeast!

10. Once the yeast was pitched I sealed the FV, topped off the airlock with boiled water and moved it to my temp controlled fridge with a set temp of 18.5C.

Fermentation Notes

I’ve checked the FV a couple times a day and haven’t noticed any airlock activity at all. However the fridge does smell of CO2 and beer and I can see that there has been krausen in the vessel and there’s as a good layer of trub on the bottom. On day 4 (14 June 2015) I put set temp up to 20.5C. I’ll take an SG reading after a week (17 June) and if fermentation has stalled I’ll pitch a new packet of US-05 yeast. If it hasn’t stalled I’ll dry hop and 3 days after that start cold crashing.

17 June 2015

I racked off sample today (7 days in FV) and took a gravity reading. Result was 1.015 with a target of 1.013 so it looks like fermentation is done. Interesting because I never saw any airlock activity (but I smelled it in the fridge). Sample had a lot of hops in suspension. I’ve put it into a glass in the fridge to allow the hops to settle out and consumption tonight. On the nose the sample was ever so citrusy, but not much other odour.

Sample for SG Testing

Sample for SG Testing

Have fined with 1/2tsp of gelatin dissolved into 150mL of hot water and swirled gently into the fermentation vessel. At the same time I added a muslin bag containing 50 grams of Cascade hops weighed down with marbles. I’ve turned off the temperature control on the fermentation chamber (fridge) to allow it to come to ambient and the plan is to cold crash on Monday (22 June 2015) and bottle on Friday 26 June.

Fermentation Vessel Open for Gelatine and Hop Bag

Fermentation Vessel Open for Gelatine and Hop Bag

27 June 2015

I’d turned off the temperature control a couple days before bottling and the FV was about 10C when I started. I bulk primed with 84g of brown sugar. Total yield was 12.75L so that’s around 6.7g per litre. Yield was quite a bit higher than I expected, I had anticipated between 11.5L and 12L and was trying to prime at 7g / L as the carbonation of the last brew wasn’t as much as I would have liked. The bottling process was fine with the beer noticeably clearer than any other brews. My only observation was that the hop back was too tightly packed and I suspect I didn’t get as much of an impact from dry-hopping has I could have. Note to self, bigger bag next time. I’ve put a couple of bottles inside where it is warmer to carbonate a little sooner and will try one next weekend and report back!